User:Felix Hardcastle
Who is Felix Hardcastle?
 |
Fortress Member |
| Felix Hardcastle is a proud member of The Fortress . |
Felix is a member of the legendary survivor group "The Fortress", though the group itself has long since faded away. Like a handful of others, he continues to battle the undead using the training he learned while serving in the Fortress Defense Force. Although he has had to adapt his tactics to less group oriented missions, he continues to provide support and shelter for survivors when and where he can. His survivor ID code is 1764460, and is stamped on the dog tags he wears.
Notable Events & Recent Happenings
Felix joined The Fortress in 2009, completed Basic training and was assigned to the defense of Fortress One. After reaching the rank of Assault Officer, Felix suffered a serious head wound and was reported MIA. Absent for almost exactly a decade, Felix recently awoke in Malton to discover The Fortress was gone. This was disappointing, but it didn't alter Felix's mission.
Mid October 2020
Felix discovers that the FPDF is still active and helpful, and formally renews his ally status with them. He joins their Discord channel, discovers he is (still) terrible at Karaoke, and is subsequently restricted to non-voice channels until either "his singing improves" or "disco polka comes back into style". Subsequently, he attempts to lead zombies away from Fort Perryn (ala the Pied Piper) and discovers that the undead are even less amused by his singing. After application of some FAKs, and outrunning his shambling critics, Felix is considering a career in radio broadcasting.
Late October 2020
Felix picks a fight with a small group of zombies and discovers that there are a LOT more of them than he realized. He is hunted through Fryerbank and eventually killed, becoming a zombie himself. He is now wandering around gaining experience as a zombie, by attacking other zombies (a slow, but less morally questionable activity than attacking survivors). At some point he will get a Revive, he is certain, but until then he is making himself useful to those (more fortunate) survivors.
Halloween 2020
Felix is revived by a passing NT Employee and, after a brief nap, rejoins the living. He follows a group of trick or treaters (dressed as zombies?) towards a mall to the north, figuring that there must be free candy with so many (shuffling?) kids headed that way.
Early November 2020
With pockets full of stale candy (and three new scars), Felix staggers away from the halloween gathering at the mall. He's not as young as he used to be, so he can't stay up all night partying. He spots a radio mast, and remembering his earlier idea of a career as a disc jockey, decides to climb it. Must be something in the candy...
Mid November 2020
Seeing a crowd outside Fort Perryn, Felix grabs a sign and joins the protesters. After a few minutes of trying to figure out what everyone is chanting, Felix realizes the sign he is holding says "Harmanz gah Home!" and that the chanting is really more like groaning and howling...embarrassed, Felix realizes he is a Harman and not welcome in the crowd. He slips into the Fort, buys a pair of souvenir dog tags and leaves.
Late November 2020
Felix sees a spotlight shining on a cloud, in a familiar shape. A castle? No, a Fortress! He packs his bags and picks up a dogeared notebook, setting out to find the source of the beacon...
Early December 2020
Felix hears an odd ringing sound, and realizes that his mobile phone, after decades, is actually ringing! He scrambles to answer it, only to hear a pre-recorded message about an election in the United States. He listens in growing horror as the voice describes why "it is so important for Georgians to vote on December 15th, because everything you care about is at stake". Looking around at the ruins of Malton, Felix shakes his head in disbelief, then hangs up. Just when he thought the zombie situation couldn't possibly get any worse - telemarketers...
Felix's Battle Book
| Survivor Tactics |
| The information on this page or section discusses a survivor strategy. |
Years ago, Felix authored several articles for the Fortress newspaper, some of which are gathered here and provided as a reference for other survivors.
Engineer Essentials - Resupply Missions
As a member of Fortress Defense, your duties are those of a military engineer – clearing obstacles, building or maintaining fortifications, and defending them. This also means that you will require supplies more frequently than a member of a combat team. Where they may spend a day or more moving to the location for their next RTS mission, you are constantly patrolling and repairing your local area. Therefore, getting supplies is a fundamental activity for you, and one worth discussing in more detail.
Resupply: What
Useful supplies are sorted into three categories: Tools – permanent items that are helpful to you (Fire Axe, Toolbox, Flak Jacket, Binoculars, Crowbar, Knife) Repair Parts – consumable items that are used regularly (FAKs, Spray Cans, Fuel Cans, Generators, Syringes) Weapons – items that are used only in combat (Pistols, Shotguns, Pistol Clips, Shotgun shells)
As an engineer, your early goals are to find the Tools you need. Later, you will be mostly looking for Repair Parts, and occasionally Weapons. This is because you do the most good by repairing buildings and people, and avoiding combat unless absolutely necessary.
Resupply: Where
Although everyone should be familiar with the term Tactical Resource Point (TRP), as an engineer your priorities are slightly different than the average survivor. The places where you go to find your supplies fall into two categories – what I call Primary Supply Points and Secondary Supply Points.
Primary Supply Point (PSP) – Factory, Hospital, Auto Repair Shop
Secondary Supply Point (SSP) – Police Station, Necrotech Facility, Warehouse, Junkyard
Note that Malls, Power Stations, and Fort buildings are not on this list. This is because they are rare or require specialized skills (both Shopping and Bargain Hunting) to be useful supply points.
- Primary Supply Points are places that provide critical supplies for restoring or maintaining a suburb.
- Factories are the most important building for a Fortress Defender, because they supply the most important item in the game, the Portable Generator, as well as the fuel for it. Factories are the second best place to find fuel in the game. You can also find a Toolbox, Fire Axe, or Crowbar in a factory.
- Hospitals are the next most important building for a Fortress Defender, because they supply First Aid Kits, which are the best method for gaining XP and keeping other survivors alive.
- Auto Repair Shops are useful because they are the best place to find Fuel Cans, and they also supply Spray Cans, Toolboxes, Fire Axes, and Crowbars.
- Secondary Supply Points are places that provide limited supplies, or items more useful for others.
- Police Stations supply ammunition, guns, and Flak Jackets.
- Necrotech Facilities are the ONLY place to find Revival Syringes (aka “Hypos”).
- Warehouses are another source for Fuel Cans, Fire Axes and Crowbars, but search rates are lower than Factories and Auto Repair Shops.
- Junkyards are a source for many useful items like Fuel Cans, Spray Cans, Fire Axes, Crowbars, Flak Jackets, Ammunition, and Knives. Since they cannot be ransacked and ruined by zombies, you can always search them for supplies. However they also provide lots of junk items, so searching for useful items can be frustrating.
When you are considering where to resupply, always consider your PSPs first. These are also the buildings you should prioritize when trying to repair or restore a suburb, since they provide the most critical supplies you'll need.
Resupply: How
Conducting a safe and successful resupply mission starts with planning. First, decide what supplies you are trying to find, then look at the situation in your area.
- 1. Where are the PSPs? It may be more cost effective to spend extra time in a SSP, rather than travel a long way to a PSP.
- 2. Where are the safehouses? Figure out where you will stop to rest, after you are done searching. You do not want to rest inside any supply point.
- 3. How many AP will it take you to find what you need? Look up this number in the UD Wiki (under “Items”) and do the math. If you have a 10% chance to find something, it's probably going to take 10 AP to find one of those items. You might get lucky and find something sooner, or you might be unlucky and it takes longer. Either way, you should have a rough idea of how many AP it takes (on average) to find what you need.
- 4. Figure out where you will go if something goes wrong. This is your “Plan B” - what you will do if you run into a swarm of zombies, or an active PKer, or your supply point gets ruined just as you arrive. Not having a backup plan is what kills you, more than anything else. With a limited number of moves each day, you can't afford to use them up in a panic - having a plan prevents panic.
Make your moves, and pay attention to the barricade levels of every building you pass through. If at all possible, pass through the building you plan to use later as your safehouse. Don't assume the barricades will be fine, just because a building is lit, or it was in great shape an hour ago. Zombies often break in and leave the generator running to attract survivors, and barricades can drop in minutes if multiple zombies are trying to break into the building.
Once you reach your supply point, you should repair the building, increase the barricades to VSB+2, or power the place up with a generator, as needed. This is more important in supply points that will be used by other survivors, and less important in an area that still has lots of active zombies in it (they will be attracted to the lights). Sometimes it's better to quietly search and sneak away than turn the place into a fortified zombie magnet.
Search for your supplies, remembering to leave enough AP in reserve to reach your safehouse with at least 1-2 AP left over. If it will take 3 AP to reach your safehouse, stop searching and get out when you have 4-5 AP left. Never use your last AP to move into a building. Never “AP out” in a supply point while searching, especially if it is lit up. Sooner or later you'll wake up dead.
Resupply: Dealing with Zombies
Sometimes your supply point has 1 or more zombies inside of it. Don't panic! If they aren't online, you can search for supplies and be gone without alerting them. Don't attack them, don't scan them with a DNA extractor, and don't barricade the building (or close the doors). On the other hand, if this is a Primary Supply Point, and you need to repair it for future use, you can try to kill the zombie, dump the body and then repair/barricade the place up before you move to your safehouse. This is a high AP cost gamble, however. If you attack the zombie and fail to kill it, it can follow you to your safehouse to retaliate. If you do kill it and dump it, but fail to raise the barricades afterwards, it will simply come back inside later. A better plan might be to search quietly around the zombie, retreat to your safehouse until you have full AP – then come back and try to kill, dump, repair and recade.
Summary
You will resupply often in Fortress Defense, so you should plan your patrols (and your restoration efforts) accordingly. Know where your PSPs are, and your SSPs. Plan your route to and from the supply point. Check your safehouse(s) on the way in. Search the supply point without disturbing any zombies present, and without using up your reserve AP. Get out as soon as possible, then go rest in your safehouse.
Engineer Essentials - Binoculars
There are four items of equipment that are considered essential to any well equipped engineer. These are the Toolbox, Fire Axe, Flak Jacket, and Binoculars. You should strive to acquire these four items as soon as possible, and never discard them. The toolbox allows you to build barricades and repair buildings. The fire axe doubles as a weapon, as well as your tool for reducing barricades. The flak jacket helps you weather gunfire from PKers and Death Cultists. The binoculars allow you to stealthily scout a large area of the battlefield for minimal AP cost, and they save lives.
Let's focus on that last item, your binoculars
The number one killer in UD is lack of timely, accurate information. You didn't know the building you planned to search was ruined, until you got 1 square away. You didn't know there were 15 zombies outside your safe house when you went back there for a rest. You didn't know a large number of zombies had scattered through the streets during your last rest, because you couldn't see them until you stepped out into the street – where they could see you. You didn't know your free running route had ruined buildings until you already spent AP moving along it. Your buddies didn't know either, because nobody warned them. All of these things can be prevented by proper use of your binoculars.
The Basics on Binoculars
Binoculars take up 4% of your load, and every Scout gets one as part of their starting equipment. They can also be found in Mall Sports Stores, Fort Armories, and in Stadiums. This makes them harder to find than the rest of your gear, because there are only 3 stadiums and 2 Forts in Malton, while every Mall is a danger zone. If you get the chance to search any of these locations, seize the opportunity!
Binoculars can only be used in two places:
- - inside tall buildings (any location with Motel, Hotel, Tower or Building in the name)
- - outside on open terrain (any street, cemetery, park or other square that doesn't have a building of some kind)
Binoculars work slightly differently in the open, where they cover a larger area (a 7x7 grid with you in the center) but provide much less information. You will rarely need to use them in this fashion, so I will ignore that aspect for purposes of this discussion. Tall buildings, on the other hand, are the ideal place to use your binoculars, because you are not visible from the street while doing so. Tall buildings are very common, and usually placed within 3 blocks of resource buildings and other important locations.
To use binoculars, you find the pull down menu next to them in your equipment list, and choose the direction you want to look (north, southwest, etc). Clicking on the Binoculars button will use 1 AP and give you a small pop-up map showing what you see in a 3x3 area, in that direction. The center of that 3x3 area will be 2 squares away from your current location, so you cannot see what's outside your own location.
http://i1180.photobucket.com/albums/x412/TFNreporter/Sep2010/Bino1.png
http://i1180.photobucket.com/albums/x412/TFNreporter/Sep2010/Bino2.png
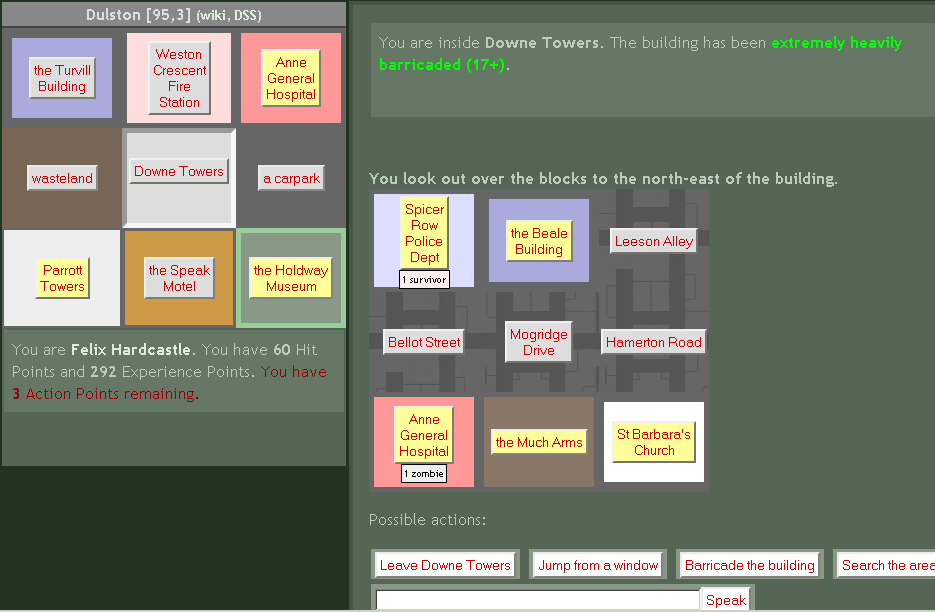
You will be able to see the condition of every building in view (lit or unlit, ruined or not) as well as any survivors or zombies that are outside in the street. Without binoculars you would have to exit your building and move 2 squares away to see the same info. This would cost you 2-3 AP, and leave you at risk of being attacked by enemies who are currently online and nearby. Moving back into your original building would cost another 2-3 AP (or more, if no entry point was handy) and enemies may see your movement, giving away your hiding spot. Using the binoculars, you would have spent 1 AP, and remained hidden from view. In fact, for the same 4 AP you spent (moving over to check those 9 squares and then moving back), you could have used your binoculars to scan 32 squares of the map!
Now that you understand the basics of how to use your binoculars, and why, let's cover when you should use them. Here are three situations where binoculars can be valuable.
Scouting your route
When you have to move long distances, you should plan your route ahead of time. Look for any areas where you might be forced to street level, like narrow free running corridors or choke points. Look for nearby danger areas (like Malls) that you may need to pass. Look for places where your route can fork, giving you a choice of two different paths to the same destination. Once you have those points located, look for a tall building just before those points. Plan to stop there and spend 2 or 3 AP looking around, before moving on. Scan the danger areas before you expose yourself to risk.
Patrolling a suburb
Look at the DSS map for your local neighborhood. Decide which places need observation – some good choices include resource buildings, revive points, VSB entry buildings, and safe houses. With those points in mind, pick a route that will take you to tall buildings within 2-3 squares of your targets. Try to pick a vantage point that will let you scan in several directions to cover multiple areas of interest. Allow yourself 5-6 AP for scanning, plus the cost of your movement, when planning your route. With a little preparation, one individual can observe one-half to two-thirds of a suburb in a single patrol.
Pre-Raid Recon
When a Real Time Strike is planned against a specific target (like a mall), having someone in an observation post nearby can provide up to date, real time information about enemy concentrations and troop movements. This information can be passed along to the strike team while they approach the target under cover, and from different directions. This conserves AP for the strike team (maximizing their offensive potential) and reduces the chances of early detection by the enemy (minimizing their exposure).
Summary
Binoculars are a powerful tool for a careful player and even more so in the hands of a skilled engineer. Binoculars allow you to gather intelligence while maintaining stealth, reducing your risk and conserving your AP. Knowledge is power – and sometimes the difference between life or death. Get yourself a pair of binoculars, and use them every patrol.
Engineer Essentials – Safe Houses
As a member of Fortress Defense, your duties are those of a military engineer – clearing obstacles, building or maintaining fortifications, and offering combat support to other players. You will require supplies more frequently than most other players, because you are constantly patrolling and repairing things in your local area. Because you move around so much, you need to be as efficient as possible in spending your AP, so you can maximize your search results. Efficiency starts with choosing the right safe house.
Safe Houses
There are basically just three definitions of a 'safe house':
- 1. The place where you end your turn each day, to 'sleep' and regain AP. (defensive aid)
- 2. A building that you use as a navigational reference point. (navigation aid)
- 3. A building you have surveyed with the Scout Safehouse skill. (offensive aid)
All of these definitions are important to an engineer, because they affect how you spend your AP each game day – either directly or indirectly. Let's look at each in turn
Sleep/Rest Location (“the Bunkhouse”)
Clearly, you want to pick a place to sleep that is as safe as possible. Avoid resource points like Malls, Hospitals, NT Buildings, Police Stations, and Factories. Resource points attract survivor players (seeking supplies) and zombie/DC/PK players (seeking survivors to kill). Avoid choke points in the Free Running lanes. Choke points are buildings that people must travel through in order to cross the suburb, and having lots of people passing through your building while you are asleep (and helpless) is a bad thing.
On the other hand, picking a location that is too far from your PSP/patrol route means you'll waste AP every day just 'driving to and from the office'. Look for a tall building (anything with 'Hotel', 'Motel', or 'Building' in the name) somewhere 2-3 blocks away from a resource point, and not in the free running lanes. That's close enough to scout with binoculars, but not so close that it attracts attention from anyone headed to the resource point. As an alternative, pick a dark building (Bank, Club or Cinema) adjacent to a tall building, which gives a little extra security from DC/PK activity.
Choosing the right location to sleep saves you AP that would otherwise be wasted traveling, healing yourself, or repairing barricades.
You can designate any location, even an empty street, as a safe house. You click on the 'Set Here' button (right below the minimap), expending 1 AP and creating a sort of beacon. No matter where you move in Malton, you can see how far away that location is, and in what direction. When things are going wrong in a hurry, knowing which way to run may save your life.
Surveyed Safe Houses ("the Convenience Store")
If you have the Survey Safehouse skill, you can use it to designate a critical supply point as your safe house. This is an expensive option, at 30 AP, and should only be done on a PSP that you expect to be able to use for 6+ days without it being ruined. Each day you get an average of 5 AP worth of 'free moves' in a surveyed safe house (you will see a message that says "You move swiftly through your safe house", which indicates whatever you just did cost you no AP). This is five extra chances to find something while searching, for example. Since it costs 30 AP to survey a place, you need to get 6 days worth of free moves to break even on your cost-to-benefit ratio. Excellent choices for a survey include Factories and Auto Shops, because generators and fuel are in constant demand. If the area you are operating in is in bad shape, Junkyards (which cannot be ruined, and are usually available as entry points for Free Running) are a good choice as well. They provide many useful items, but also a lot of useless items, so the free moves help offset the clutter you find.
Understand that the 'free moves' idea is based on what the skill actually does, mechanically. It gives you a flat 10% chance to discount your AP for any action you spend inside the scouted safehouse. In the example above, I talk about spending a whole days worth of AP searching for supplies, but ANY action you take in the safehouse might get the discount if the RNG is nice to you. Healing, attacking, barricading, transmitting on a radio - anything that costs an AP has a 10% chance to cost you zero AP instead. The critical issue is whether or not your safehouse will avoid being ruined for at least 6 days straight. If it falls within that time period, you have not had an opportunity to 'earn back' those 30 AP you spent scouting. Its all about the number of AP you spend in the safehouse versus the number of times the '10% chance' comes up. Don't survey a safehouse that is likely to targeted by a horde in the next few days (the Gatehouse, during a major battle for control of a Fort, is one of the only exceptions - it can make a difference in a long siege but only if you expect your side to hold the building for a while).
Having said all of that, it is important to look at the actual opportunity cost of spending those 30 AP. If you are active every day, and actively using your AP once you hit the max of 50 AP, then everything I wrote above applies. However, if you are going to be inactive for a while (out of game for a weekend, while on a trip or something) then spending the AP before you logout costs you nothing at all, since you will have regenerated all your AP before you return to the game. In that case, every 'free move' you get from that surveyed safe house is pure profit thereafter - you did not have to sacrifice anything to gain that little edge.
Summary
A proper safe house can make your mission safer, easier to conduct, and more productive. Study the DSS map of Malton, choose carefully, and always have an alternate location (or two) in mind.
Engineer Essentials - Encumbrance & Loadout
Engineers carry a lot of gear, it's in their nature. You need tools and supplies to fix or build things, and searching for replacement supplies is a huge part of your game play.

|
Curse You Encumbrance!!! |
| This user carries around a lot of crap. |
What Was I Looking For Again?
It pays to fine tune your item search options. This way you are not wasting AP looking for items that you DON'T want, while ignoring items you DO want. Let's review the process right now.
1. Open your game in the browser, check to see what you are carrying or wearing. If you have anything you don't need, drop it (for 0 AP cost). This includes junk like poetry books or GPS units, and useless duplicates like an extra flak jacket, or more than one fire axe.
2. Now go to Game Preferences. Look at the items list under Game Preferences, then UNCHECK ALL THE BOXES.
3. Now CHECK the boxes for these things that you always want to find:
- First Aid Kit
- NecroTech Syringe
- Fuel Can
- Spray Can
- Portable Generator
- Pistol*
- Pistol Clip*
- Shotgun*
- Shotgun Shell*
(*If you are not interested in carrying a gun, then don't bother checking the Pistol/Shotgun/ammo boxes)
4. Now CHECK the boxes for any of these items that you DON'T already have:
- Binoculars*
- Crowbar*
- DNA Extractor*
- Fire Axe*
- Flak Jacket*
- Knife*
- Toolbox*
(*If you already have one of these items, don't bother checking that box, as picking up another only wastes your encumbrance allowance.)
Congratulations, you should now be searching (only) for things you can use in the game, without missing anything you wanted to find.
What To Carry?
As your skills develop, you will be able to use a wider selection of items. This allows you to handle a broad variety of situations. Your skills dictate what is useful to you, and gaining certain skills makes some items obsolete. For example, until you have the Necrotech Employment skill, carrying a DNA Extractor around won't be helpful because you cannot use it without the skill. Once you have a Fire Axe and all the supporting skills for it, a Crowbar is no longer worth carrying, since you can de-barricade just as well using the axe. Every time you upgrade your skills, it's a good idea to review your search filters and your current inventory.
As your mission goals change, you may decide to carry more or less of any given item like fuel, or generators. Depending on your play style, you may prefer to carry guns and ammo for better "up front" damage in a fight (at the cost of having to spend days worth of AP getting more ammo), or you may decide to just carry a Fire Axe and no guns at all (taking longer to kill a zombie, but not having to waste days looking for guns/ammo later). Your choice of gear is called your loadout, and each item you carry or wear takes up a certain amount of encumbrance (first aid kits are 2% each, while a toolbox is a 16%, and so forth). Once you hit 100% encumbrance or higher you cannot pick up anything else, so pay attention to how much you are carrying before you waste AP searching for things.
Overloading
You can go over 100% encumbrance, if you add a heavy item before you reach 100%. For example, if you were at 98% encumbered, you could still pick up a generator (+20% encumbrance), putting you at 118% encumbered (this is the maximum anyone can carry). When possible, search for heavy items like fuel or generators last, so you can benefit from overloading.
Sample Loadout
While everyone will develop their own personal style, this is an example of a balanced load out for an engineer:
Basic Gear (permanent): 34% encumbrance
- Flak Jacket
- Binoculars
- Toolbox
- Fire Axe
- DNA Extractor
- Knife
Consumables (must be replaced after you use them): 64% encumbrance
- First Aid Kits x5
- Revival Syringes x2
- Spray Cans x2 (alternatively, consider exchanging a Mobile Phone for one of your spray cans, as the DSS Satellite Phones are no longer working)
- Pistol (loaded w/6 shots)
- Pistol Clip (6 shots)
- Fuel Can x2
- Generator
This leaves you at 98%, so if you find another Fuel Can or Generator, you can overload with it - bringing you to 108% or 118% (respectively).
Reasoning behind the gear choices
The flak jacket helps you survive attacks by PKers. Binoculars allow you to scout large areas of the map efficiently. The toolbox and fire axe are essential for all barricading operations. The knife is the best tool to kill a generator. The DNA extractor helps you identify individual zombies and add them to you contact list (and it helps prevent wasting AP/hypo on a Rotter). Spray cans are for tagging buildings with barricade reminders, directions to revive points, recruiting slogans, or covering up graffiti. The pistol and spare clip allow you to help out on a team assault, if you so desire. If working alone (or you prefer to only use a fire axe), the pistol and ammo can be replaced with 3 more FAKs/Hypos instead.
Summary
Choosing the right gear to carry increases your chances of survival and success. As your skills and mission change, so should your loadout. Don't waste encumbrance carrying useless gear, or unnecessary duplicates. Take advantage of overloading to carry an extra fuel can or generator, whenever you can. Review your search filters regularly, so you don't overlook things or waste space picking up junk you don't need.
Engineer Essentials - Receiving A Revive
Congratulations, you have just been injected with a revivification serum, and will shortly return to (or join) the ranks of the living. Before you do anything, please consider the following advice:
DON'T STAND UP YET!
As long as you are lying there prone, you are:
- completely safe from further attacks or damage
- regaining your Action Points
- able to think, and plan your next several moves
LOOK AROUND
If there are zombies nearby, standing up is an invitation to come and kill you again. You need to figure out where you are going to move to, once you do stand up. Use the maps in the Wiki to figure out:
- where you are now (it's easy to get confused about where you are, trust me)
- where the nearest safe places might be in your suburb
- what the overall situation is in your suburb, and the ones around it
ARE YOU INFECTED?
If a zombie bit you before you died, you are probably infected. Once you stand up, you should use a First Aid Kit on yourself immediately. One FAK will cure the infection and give you 5 more HP.
Consider this:
- while infected, every action you take (except "Speak") will drain one more Hit Point from you
- when you get revived, you are at half your normal Hit Points.
- trying to fight or run away while infected will kill you very fast, and you will STILL be infected!
HOW CAN YOU AVOID NEEDING ANOTHER REVIVE?
- Always carry one First Aid Kit for yourself, and never use it on anyone else. That's the one you use to cure your infection, once you stand up.
- Always end your turn inside a safe building.
- Hospitals, Police Stations, Fire Stations, Necrotech Buildings, and Malls are NOT safe buildings. These places are NEVER a safe place to sleep, because this is where humans go for supplies and where zombies go for humans.
- Don't attack zombies in the streets, unless you are sure you can kill them. They can follow you by your smell, if you attack them and fail to kill them. This is another reason to avoid sleeping in those buildings listed above - some idiot may lead zombies back to your safe house for a free meal.
Felix Supports

|
Sacred Ground Policy Supporter |
| This user or group supports the Sacred Ground Policy and acknowledges that all Cemeteries in the city of Malton are considered Revivification Points. |
| Religious Respect Policy Supporter | |
| This user or group supports the Religious Respect Policy |
 |
No Random Revives Supporter |
| This User or Group supports the No Random Revive Policy by utilizing Revivification Request tools. |
 |
PK Reporting |
| This User or Group supports PK Reporting. Don't let Player Killers get away with murder. Report them on the Rogues Gallery. |
 |
Civility |
| This user or group believes that while zambahz and humans must kill each other, they can still be civil about it. |

|
The Good Old Days… |
| This user remembers the good old days, when the only zombies he met were in a video game. |
Additional Stuff
In real life, Felix is an old Army veteran, married (with cats), living outside a small town in Georgia/USA where they filmed "The Walking Dead" TV series. He does in fact, have a fire axe in his vehicle, just in case. The head injury referred to above occurred in 2010, and dramatically changed his life. He still struggles with the after effects, and has a hard heart for people who drive drunk, or talk on their cellphones while doing so. He plays Urban Dead in his spare time, as well as 7 Days To Die, another zombie horror survival game. If you see him moving or typing erratically in either game, its because his cats are 'helping' at the keyboard.
| American | |
| This user is American. |
| Alt user | |
| This user has alts but DOESN'T Zerg. |