Northeastern Crusade: Difference between revisions
Nemesis645 (talk | contribs) |
Nemesis645 (talk | contribs) |
||
| Line 77: | Line 77: | ||
===Individuals=== | ===Individuals=== | ||
You guys have a good idea. I will help as at the minute all adjacent suburbs are either yellow or orange. Firstly, I need to clear my suburb out. | You guys have a good idea. I will help as at the minute all adjacent suburbs are either yellow or orange. Firstly, I need to clear my suburb out. If you could help [[Huntley Heights]] by making it a green zone, this could get you some more help. [[User:Nemesis645|Nemesis645]] 21:22, 23 December 2008 (UTC) | ||
==Progress of the Crusade== | ==Progress of the Crusade== | ||
Revision as of 21:24, 23 December 2008
| Northeastern Crusade | |

| |
| Abbreviation: | NEC, Crusade, the Crusade |
| Group Numbers: | All who take up the cause |
| Leadership: | Common consensus of Crusader leaders |
| Goals: | Take back the Northeast from the hordes. |
| Recruitment Policy: | Group leaders contact current Crusaders and sign up on the forum below, individuals keep an eye on the wiki |
| Contact: | Official Forum |
Call to Arms
Seeing the dire threat facing survivors as a whole a Crusade has been called for to muster all survivor groups who wish to take back that which has been lost to the hordes in the name of Humanity. This Crusade will not rest until all of the northeast, from Peppardville to Dulston is safely back in survivor hands and the hordes pushed back. That which has fallen to teeth and claws borne on rotten flesh will be restored by the blood, bullets, and bravery of those who fight for the cause of Humanity.
Joining the Cause
All groups wishing to join this righteous and noble cause go to the forum here, sign up, declare your group wishes to take up arms for the cause, and sign the section on this wiki below.
For any individual survivors wishing to fight in this noble effort simply follow the map we have posted below of where we are striking and the situation in the various suburbs and put in for your group name Northeastern Crusade as a sign of solidarity and support.
Crusade Tactics
Strike teams
Many resource buildings are full of zombies. And many buildings have high repair costs - so high, in fact, that it's impossible for a single person to both repair the place and cade it. To combat problems like this, strike teams of two or more survivors are needed.
If you're not already a member of a strike team, and care to be a part of one of these, log onto the crusade IRC channel at one of several scheduled times. Register on the crusade forum, or contact one of the crusade leaders, for more details.
Are you zombified? It doesn't matter. Claws don't need reloading. And they're more effective than axes. As long as there's a breathing human working with you, to dump the bodies and repair the building, you're a perfect killing/clearing machine.
Independent players
Don't care for IRC or extensive metagaming? You're still needed. Show up, and focus on reviving, repairing, cading, and FAKing. More specifically:
DO
- Revive. Clear revive points. Consider both DIRTNAP and CRAP tactics. Don't be afraid to combat revive. (Here's how to combat revive wisely).
- Repair. Everyone working in a red zone should have a toolbox. You'll run into many buildings that are ruined and empty, or that only have one or two zombies in them. Clear these buildings (either by shooting or combat-reviving) and repair them. More repaired buildings = more hiding places for survivors, and more frustration for zombies.
- Barricade. But follow the suburb's barricade plan. Don't OVERcade. You'll screw over the newbies, and this ISN'T something we need to be doing.
- FAK.
- Loot repaired and fueled buildings for supplies. Other players have sacrificed a lot to get places like NTs and hospitals up and running, and they don't tend to stay up for long. Don't let the opportunity go to waste.
- Install and fuel generators. (In TRPs, that is. Don't waste them on places like arms and hotels).
- Kill rotters that are clogging revive points.
DON'T
- Shoot zombies standing outside. Seriously...this is just plain stupid.
- Shoot into an overwhelming horde of zombies. There's such a thing as a "lost cause." 12 zombies vs. 2 humans is one of them, and you aren't going to do much to them on your own. Let strike teams take care of this, and use your AP to instead clear, repair, and cade other buildings in the suburb.
Basically, ONLY shoot zombies if they are clogging a revive point, or if you can repair the building they were standing in directly after killing them. Again, every AP counts. Use them efficiently.
Other Useful Tips
- Don't be afraid of sleeping in a ruined building, in fact some of the best places to hide are junkyards and dark, ruined buildings.
- Generators can be plugged into ruined buildings and boost the search rates to something in the neighborhood of an unruined structure. The best part is powered ruins look like any other ruins from the street.
- If you have Lab Experience always carry at least one syringe on you. Pay It Forward whenever you get revived, every person we revive is another person who can clear, repair, and cade.
- If you need supplies then go resupply, as much as we appreciate enthusiastic support enthusiastic supporters without the means to operate can't do very much for the cause.
- Focus on the target suburb, we need every AP we can get for successful reclamation operations to happen. Only leave for resupply or if there is a resource building within 2 blocks of the target suburb that can be easily retaken to aid in resupply.
- It cannot be said enough to keep information on here up-to-date. If you see something in the target suburb that isn't on the wiki map post said info on the talk page.
Crusade Members
All those who have signed below are in support of this glorious cause:
Groups
Imperium of Man signed on 01:31, 22 November 2008 (UTC)
FOXHOUND has pledged their desire to re-take the Northeast Corner of Malton.
The U.B.C.S. will be there, leaving our mark on Dulston!
Death's Minions is going lay all the undead to rest...
Umbrella Corporation will finally lay to rest the foul hordes, permanently.
Individuals
You guys have a good idea. I will help as at the minute all adjacent suburbs are either yellow or orange. Firstly, I need to clear my suburb out. If you could help Huntley Heights by making it a green zone, this could get you some more help. Nemesis645 21:22, 23 December 2008 (UTC)
Progress of the Crusade
The map below shows where the Crusade is currently striking. Suburbs in bright red are those currently being freed, those that are a duller shade are those that have been liberated by the Northeastern Crusade:
Current Target Status
Below is a map of the specific suburb we are striking at with intelligence information posted there. Unless otherwise noted assume all buildings to be ruined.
Post any information on ruined buildings, enemy concentrations, and revive point queues in the talk page so the map below can be updated and kept accurate. Priority targets are the NecroTech facilities and nearby positions followed up with heavy work on the revive points.
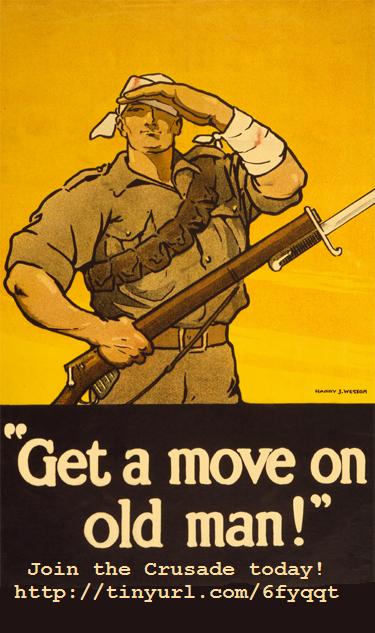
Posters, Slogans, and Propaganda
Posters
Annals of the Crusade
Here we have the specifics of each step of the Crusade with details of the operations in that particular suburb.
Huntley Heights
This was the first suburb hit by the Crusade. What at first seemed easily done thanks to the fervor and enthusiasm of the Crusaders turned into two weeks of hard fighting, so much so that some groups moved ahead of the target position due to this misplaced assessment of the situation. The fighting at first revolved around taking and holding the resource buildings and was hampered by lack of effective medical facilities in the suburb but soon shifted direction to mass revives and cade strafing which proved to break the stalemate and allow for survivor numbers of locals to reach the tipping point allowing the Crusade to then move on the Heytown.
Shearbank
The Crusade assembled and rallied here, loading up on supplies in Stickling Mall and the surrounding facilities and assisting in the upkeep of the suburb while preparing for the first target of Huntley Heights.


